Impurity test
In this tab, you can define and check one or more impurity test. Each impurity test is a check performed on several samples compared to one reference.
The Impurity test tab is similar to the System Suitability Testing (SST) tab, with a left Overview section to choose the illumination, a top Checks section where the list of checks can be configured, and a main Data View section displaying the corresponding tracks:
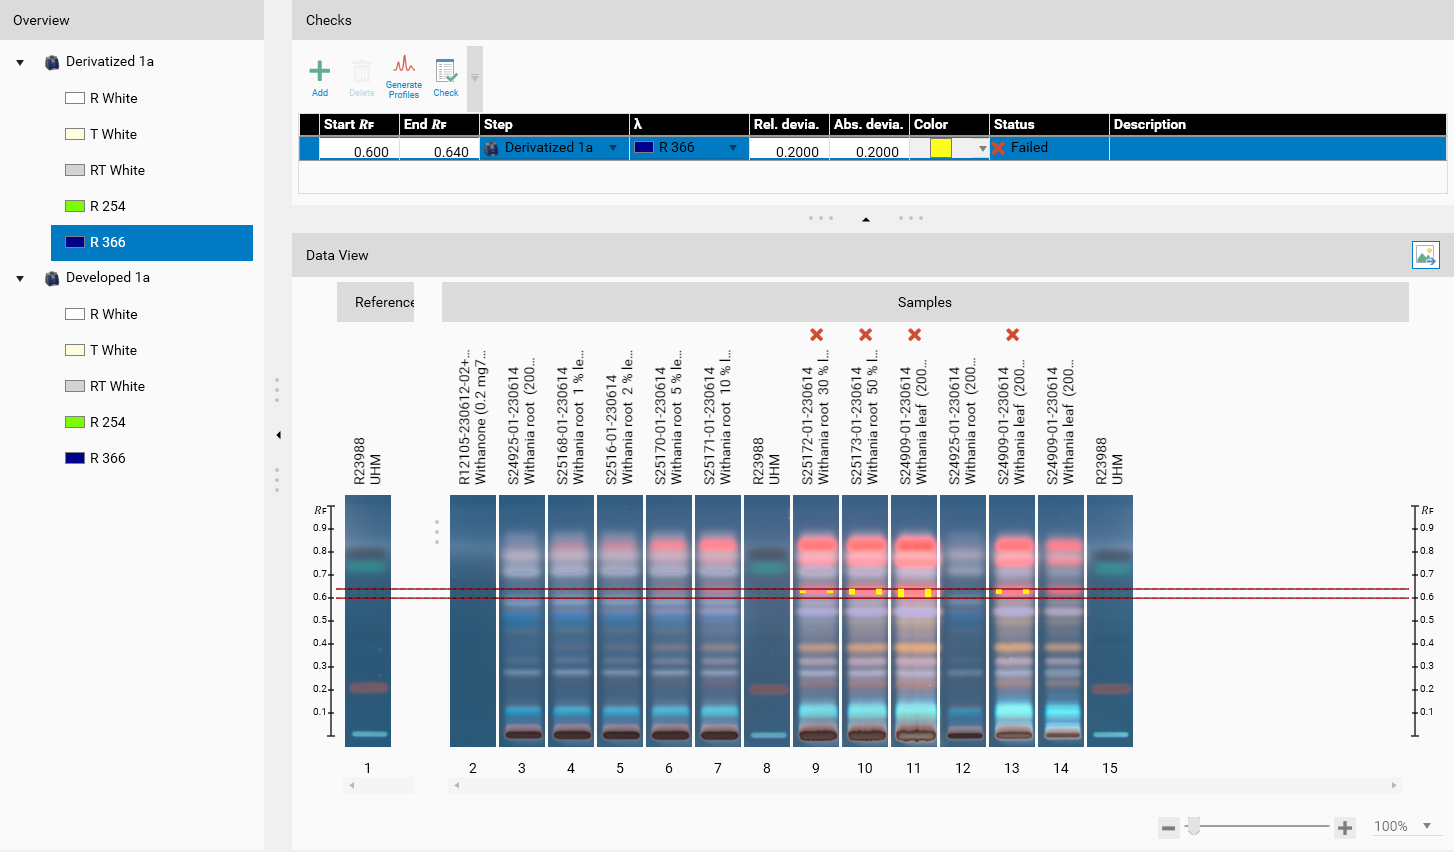
Checks
It is the definition of the tests, e.g. which region of interest should be at which 𝑅ꜰ. Each definition has the following fields:
Start 𝑅ꜰ: start of the 𝑅ꜰ range
End 𝑅ꜰ: end of the 𝑅ꜰ range
Step: the step which should be used for checking
λ: wavelength or illumination which should be used for checking (only the ones available from the selected step are visible)
Relative deviation: define the maximum allowed relative deviation of each sample track compared to the reference track
Absolute deviation: define the maximum allowed absolute deviation of each sample track compared to the reference track
Color: the color used in the main Data View to materialize the portions in sample tracks where the deviation exceeds the given values
Status: the state of the check (see Check computation)
 Failed
 Passed
 Not computed: resolve any error and click on the Check button (all the steps used in the impurity test definition should already be executed)
Description: free text field
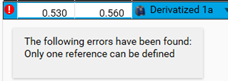
Important
Definition errors appear in the row header, and the Check button is disabled. For example, only one reference should be defined per check. All other tracks on reference side should be dragged and dropped to the sample side.
Toolbar
 Add a check definition
 Delete the currently selected check definition
 Generate profiles for all track (from image data)
Note
Deletes all output data (peaks, assignments, calibration functions and results) for evaluations based on a TLC Visualizer step
Only available if the current analysis does not contain any locked evaluation based on a TLC Visualizer step
 Compute all checks (see Check computation)
Check computation
When the Check button is hit, the Status is computed for each check in the table. For each check, visionCATS iterates through the samples in the defined Step/Illumination and each value (AU) on the 𝑅ꜰ range defined is compared to the corresponding reference value. The comparison is performed on AU values determined by generating track profiles with default integration options (Bounds [0;1], Smoothing Savitzky Golay with Window at 7, Baseline Lower slope). The comparison passes if the sample point equals the reference point +/- the Absolute deviation or +/- the Relative deviation (where “1” can be seen as “100%”).
Examples:
Ref. luminance |
Absolute deviation |
Relative deviation |
Sample AU x passes if |
|---|---|---|---|
0.200 |
0.050 |
0.200 |
0.150 < x < 0.250 |
0.500 |
0.050 |
0.200 |
0.400 < x < 0.600 |
0.800 |
0.050 |
0.200 |
0.640 < x < 0.960 |
0.200 |
0.100 |
0.150 |
0.100 < x < 0.300 |
0.500 |
0.100 |
0.150 |
0.400 < x < 0.600 |
0.800 |
0.100 |
0.150 |
0.680 < x < 0.920 |
The Status of the check is Passed only if all comparisons for all sample points pass. A point where the comparison does not pass appears visually in the Data View section with the corresponding Color.
Overview
Here you can select the illumination or wavelength of a specific HPTLC step you want to view. Clean plate data acquisition steps are not shown. For TLC Visualizer steps, the profiles must be generated by using the Generate Profiles function.
Warning
The impurity test is only available for TLC Visualizer steps.
Note
This section is not available for visionCATS Methods.
Data View
The Data View section displays the tracks corresponding to the selected Step/Illumination in the Overview. By default, tracks are placed in the References and Samples sections corresponding to their type in the Track Assignment table. Then for a given check (i.e. as soon as one check is selected, the tracks can be moved from/to References and Samples), and they can be added/removed from the check.
Important
To be able to see the visual result of the check, both the check definition in Checks and the corresponding Step/Illumination in the Overview must be selected.
In the title bar of the section, a button ![]() Export as image allows to export the current view as an image file (excluded tracks do not appear in the exported image).
Export as image allows to export the current view as an image file (excluded tracks do not appear in the exported image).
To move a track from one section to another, drag and drop it to the desired section.
Each sample track also displays:
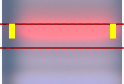
- if the track failed the check (when the check is computed)
The failed regions are highlighted with the color defined in the check definition:
Hovering an item makes the include
 or exclude
  button appear. Use it to include/exclude a track from the selected check.
Note
This section is not available for visionCATS Methods.