HPTLC PRO Module
Aside from double clicking  on the module in the Instruments Toolbox, it is possible to open the details view of a HPTLC PRO Module by double clicking
  on:
on:
The module icon in the CAMAG® HPTLC PRO SYSTEM Configuration window.
The schematic view of the module in the CAMAG® HPTLC PRO SYSTEM Details window.
Properties tab
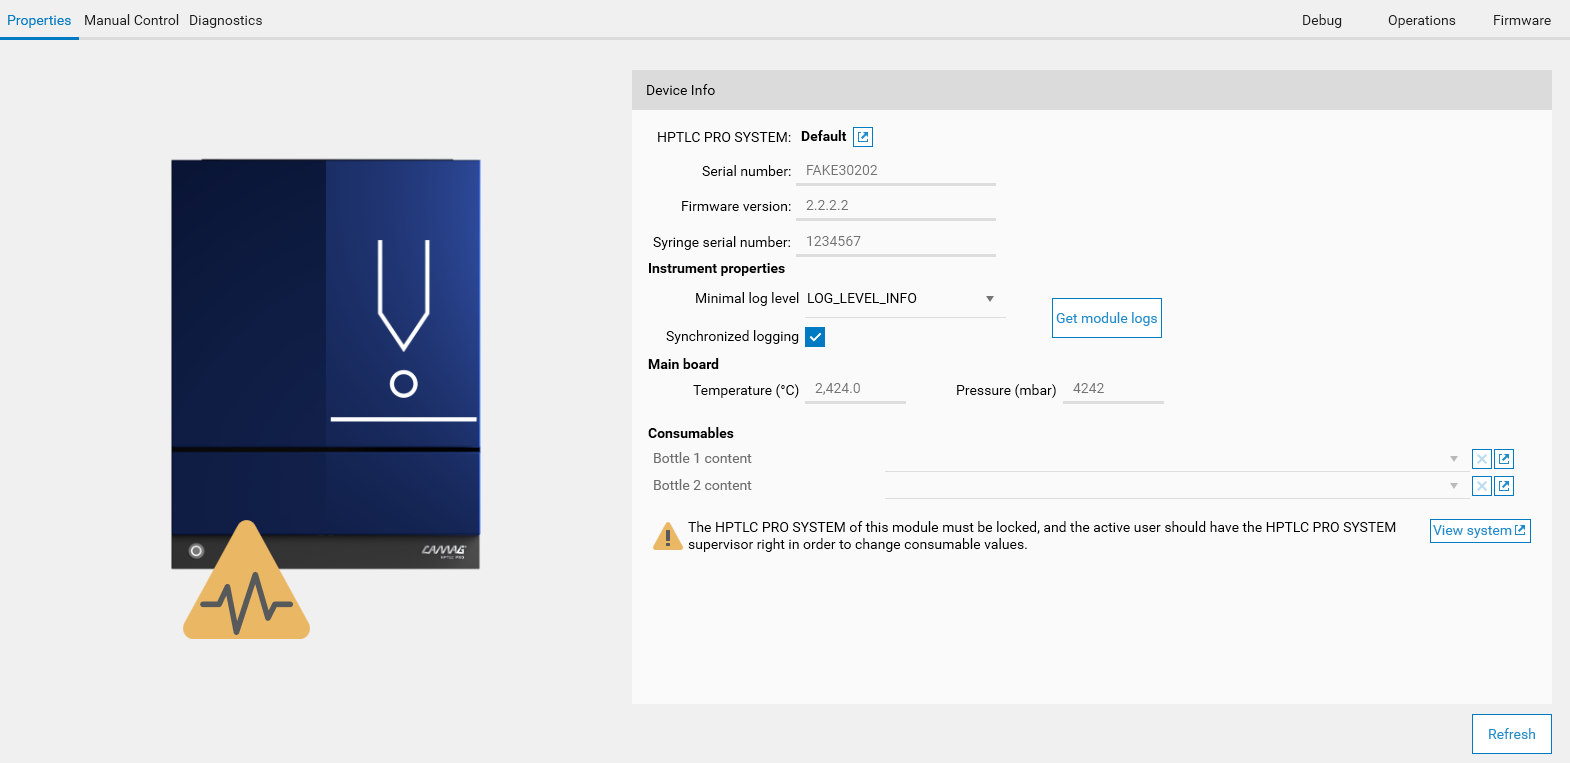
The tab displays the following information:
Like for other instruments, some high-level information about the instrument (corresponding CAMAG® HPTLC PRO SYSTEM, serial number and firmware version)
An Instrument properties section allows to configure and retrieve the module logs (see visionCATS logs available)
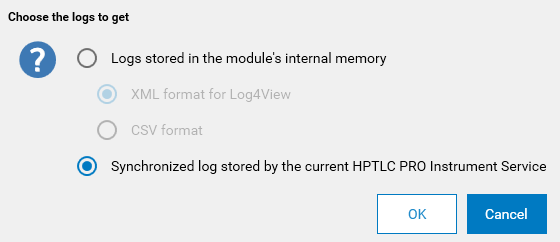
Each HPTLC PRO Module has its own log file stored directly in the internal memory of the module. The information of this log file can be decisive in troubleshooting scenarios, but the file is limited in size. Additionally, the modules can only count the number of milliseconds elapsed since the instrument was started and have therefore no date/time information. If the Synchronized Logging mode is activated (it is activated by default and should not be deactivated unless requested by CAMAG or your distributor) and if the module is connected, the new log entries are sent to the HPTLC PRO Instrument Service, which stores them in a dedicated log file. The dedicated log files adds full date/time information and is way bigger than the internally stored file, which allows to browse farther the log history, but it only receives log entries once the module is connected and initialized. As each log file has its own pros and cons, the suitable log file depends on the troubleshooting scenario. Consequently, visionCATS provides the following options when the Get instrument logs button is clicked:
Note
The way log files should be analyzed is not covered in this documentation.
The Main board section shows temperature/pressure information coming from the main board of the module (similar to the information provided by computer motherboards). This board is common to all HPTLC PRO Modules.
The Consumables values of the module (see Consumables validation). The consumables available depend on the type of the module.
Note
The HPTLC PRO Module PLATE STORAGE does not have any consumable. The Properties tab displays the status of the stackers and allows to configure the tube length (related to the fans power rates).
Manual control tab
Like other instruments, the Manual Control tab gives access to special instrument commands. Refer to the instruction manual of each HPTLC PRO Module for more details.
CAMAG® HPTLC PRO Module PLATE STORAGE
The HPTLC PRO Module PLATE STORAGE does not provide any manual control operation.
CAMAG® HPTLC PRO Module APPLICATION
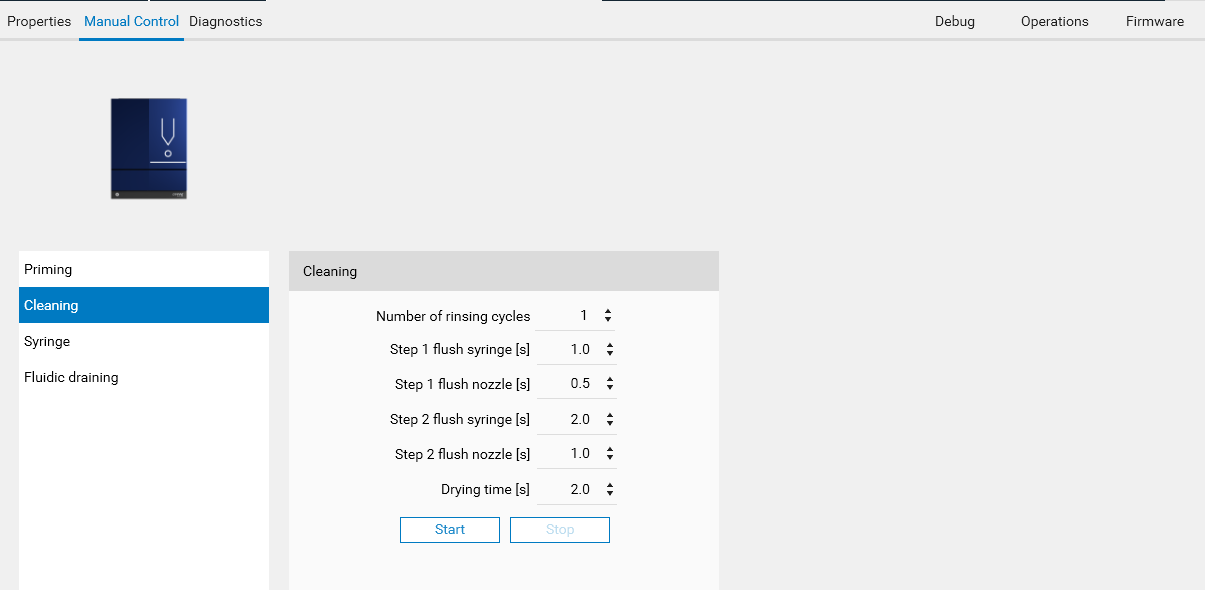
Priming
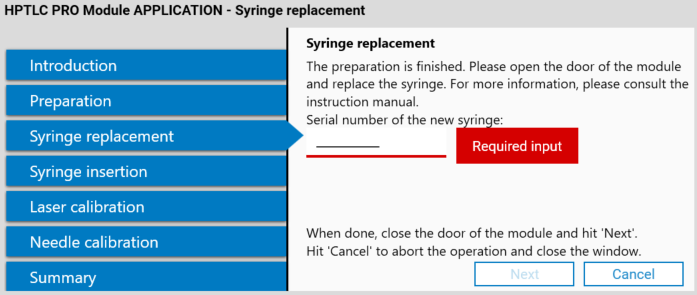
Syringe-related manual control operations. Concerning the Syringe replacement and the Syringe cleaning operations, a wizard will guide you through the process. Notably, the Syringe replacement will ask for the serial number of the new syringe:
Fluidic draining
CAMAG® HPTLC PRO Module DEVELOPMENT
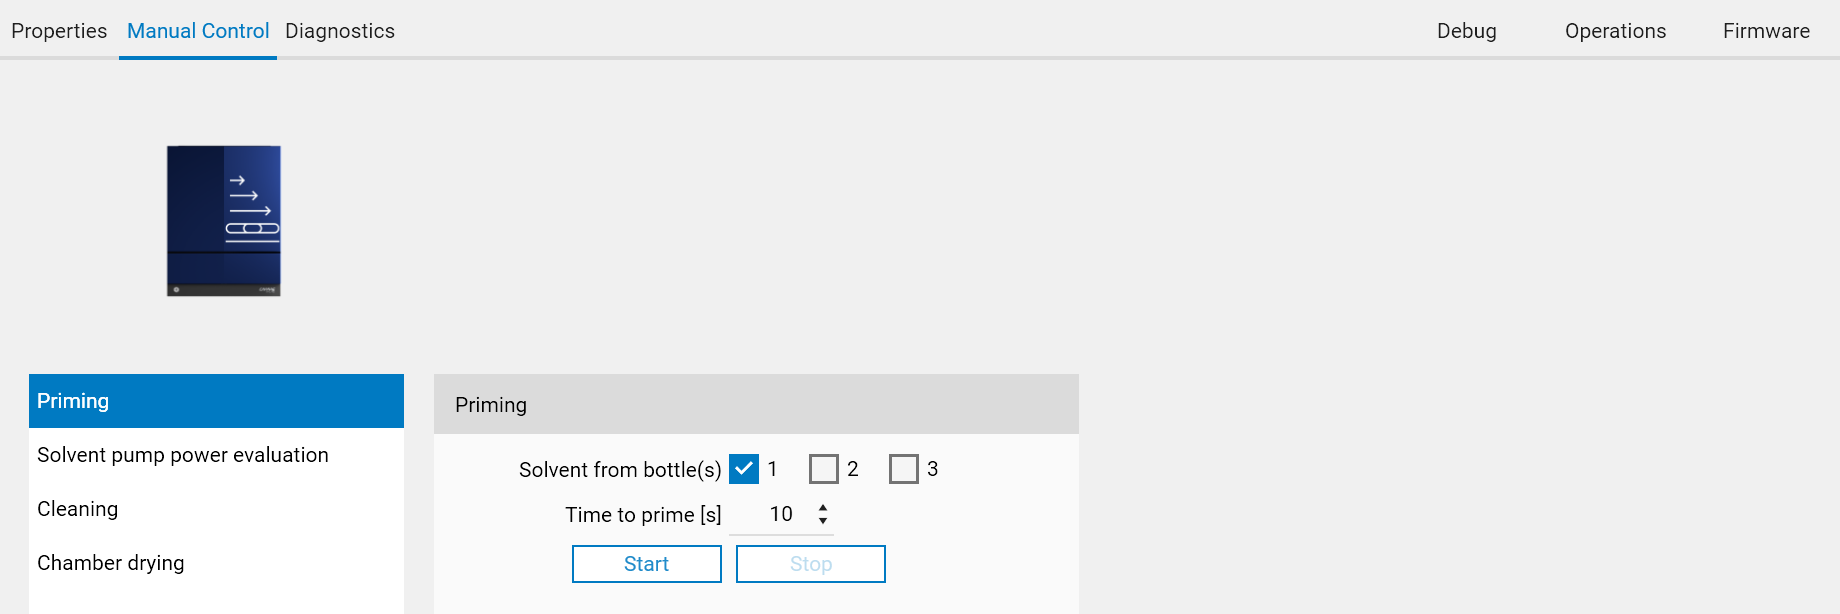
Priming
Solvent pump power evaluation
Cleaning
Chamber drying
CAMAG® HPTLC PRO Module DERIVATIZATION
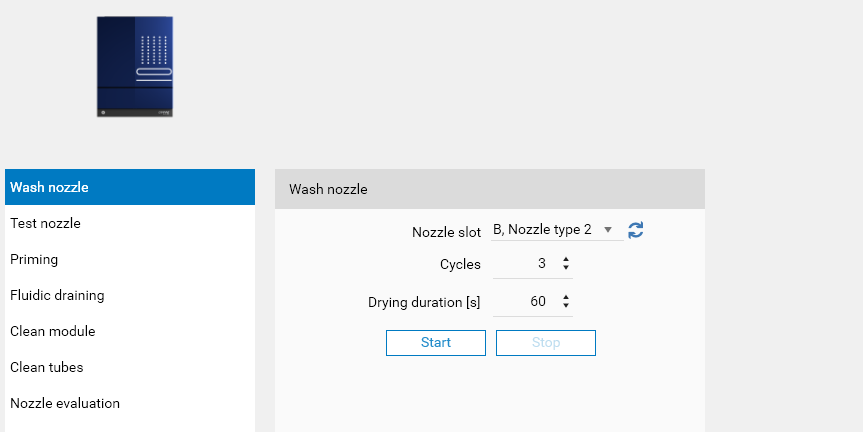
Wash nozzle
Test nozzle
Priming
Fluidic draining
Clean module
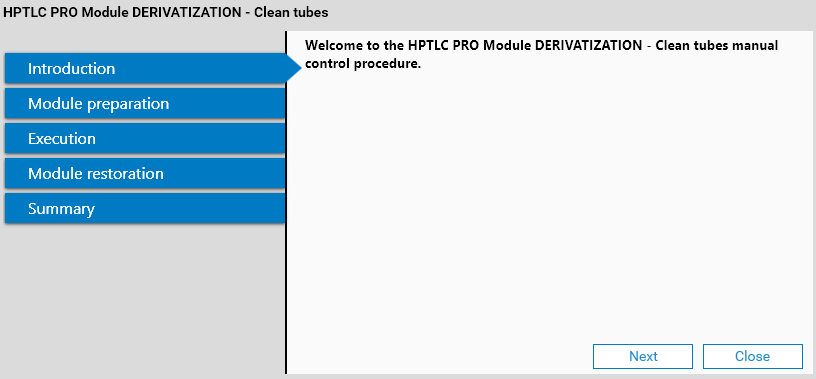
Clean tubes, for which a wizard guide you through the process:
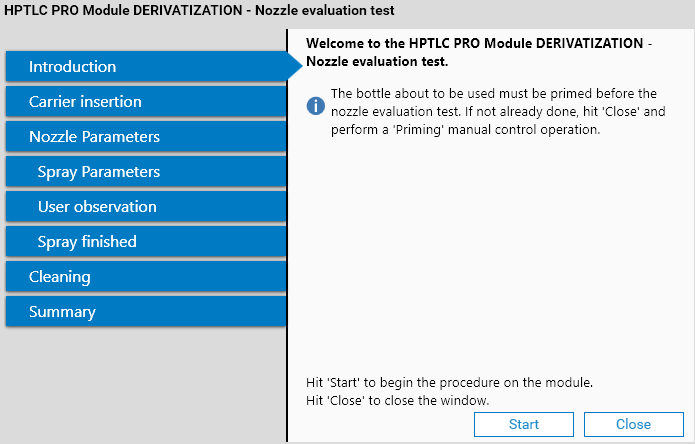
Nozzle evaluation, which consists of a wizard where the direct observation and evaluation of the spraying (with the configured parameters) is performed while the door of the module is opened:
Diagnostics tab
visionCATS provides instrument diagnostics for HPTLC PRO Modules, like for HPTLC instruments (see Instrument diagnostics):
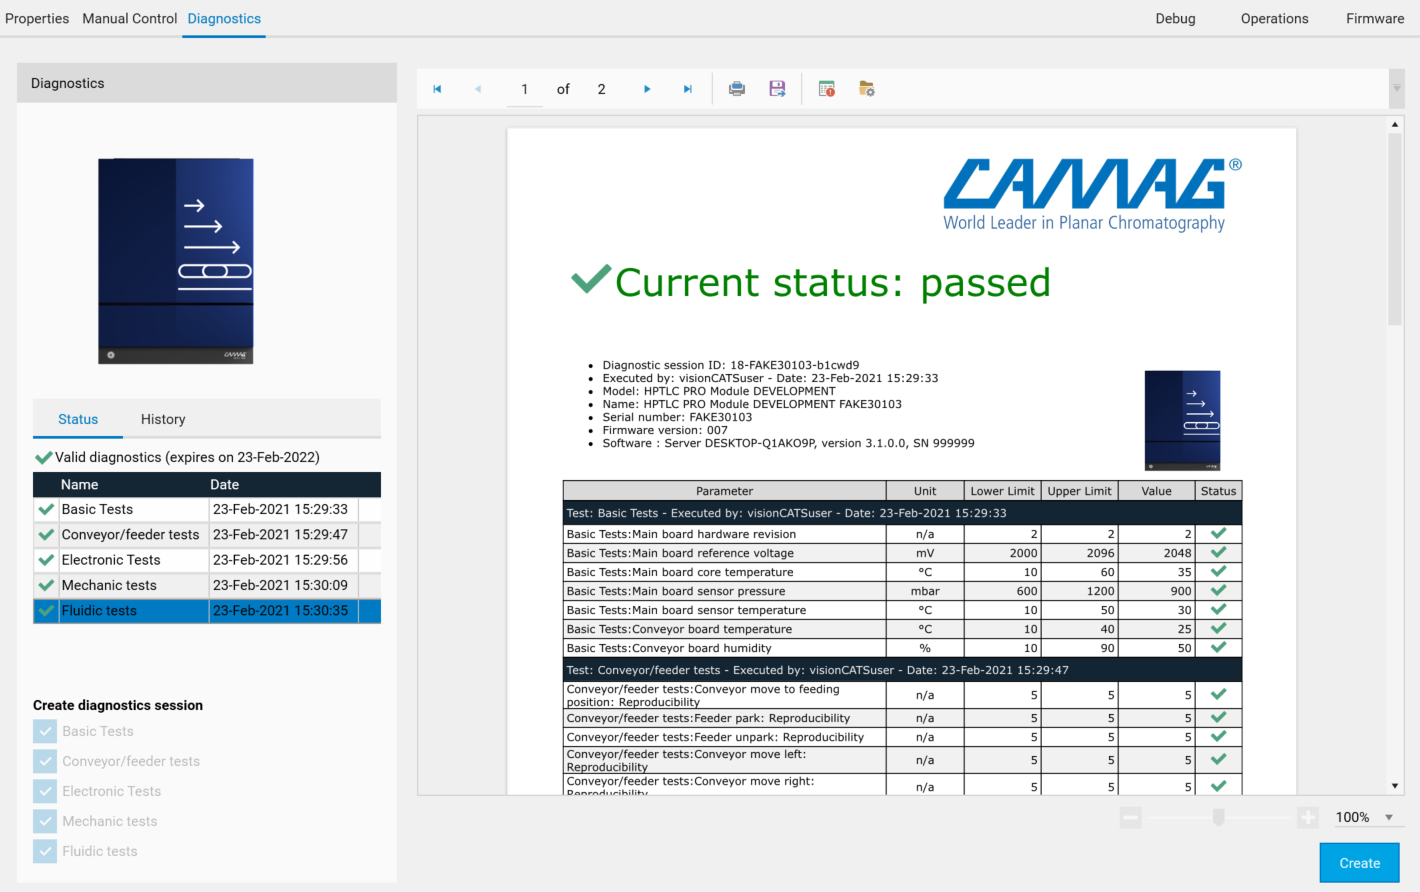
Provided that all HPTLC PRO Modules are built on the same platform, they all have a conveyor and (except for the HPTLC PRO Module PLATE STORAGE) a feeder. Therefore, Basic tests and a part of Conveyor/feeder tests are the same for all HPTLC PRO Modules.
Note
The HPTLC PRO SYSTEM itself also has a dedicated diagnostics tab. See Diagnostics tab.
Operations tab
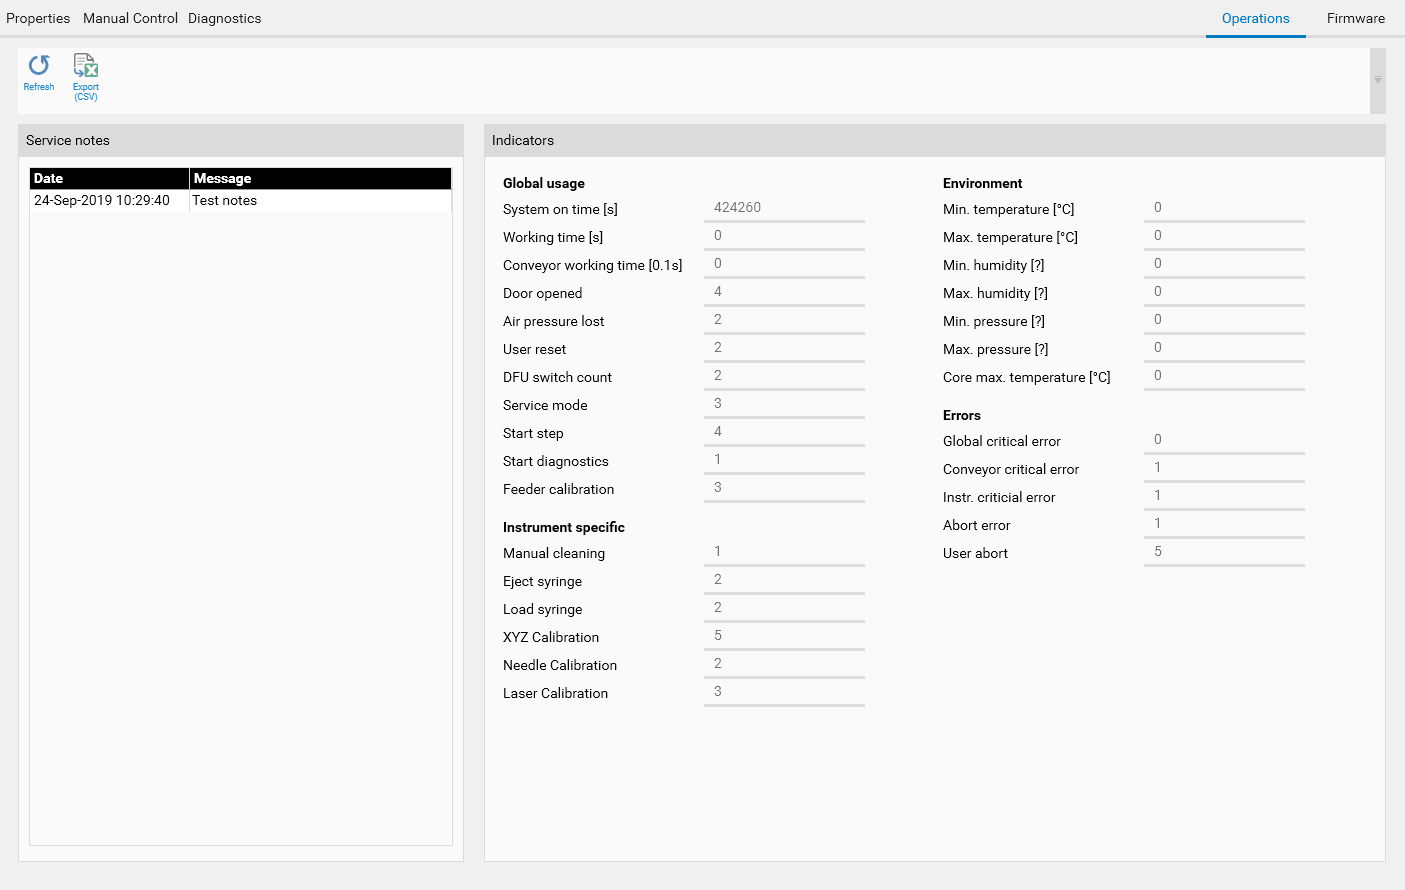
The Operations tab displays information and counters stored on the HPTLC PRO Module itself and is therefore useful for service purposes and to follow the state of the instrument over the time:
The Service notes section contains up to 10 service messages. Messages are characterized by a timestamp and a simple text, and can be entered by a service person. Service notes can be typically used to document a hardware change on the instrument.
The Indicators section details the different counters available. Some counters, such as System on time, are regularly updated (currently every 10 minutes) while others, such as Door opened correspond to an event and are updated immediately.
Firmware tab

The Firmware tab is mainly used to perform firmware upgrades.
The Current module information panel details advanced versioning information of the currently connected HPTLC PRO Module.
The main Firmware upgrade part enable firmware upgrade within visionCATS by offering the 2 main options:
The Regular update option used to install a version provided directly by visionCATS. Indeed, visionCATS includes the latest firmware for each HPTLC PRO Module. This way, it is possible to upgrade the firmware of HPTLC PRO Modules after installing a new version of visionCATS.
In case of new firmware versions coming between two visionCATS releases, for example to include corrections, the Manual update option allows the user to specify the .pff file directly.
The Selected version details gives some important information concerning the version about to be installed and will especially display errors when the selected firmware upgrade file is designed for another HPTLC PRO Module type or if the firmware is incompatible. When the date and version numbers are displayed, they allow to compare the version about to be installed with the current version of the module, displayed in the Current module information panel.
Note
Since visionCATS 3.2, the firmware upgrade files have the .pff extension (replacing .dfu).
The Backup memory and Continue on memory backup failure options provide an additional security to be able to recover from errors during firmware upgrade. When Backup memory is checked, the firmware update procedure will first perform a full backup of the contents of the memory and save it in the RomBackup folder inside the installation folder. If something goes wrong during the update, please contact CAMAG Support to revert back to the old firmware manually and restore the backup.
During the firmware upgrade process:
The module is switched to a special Firmware upgrading mode which makes the module not usable for regular commands, and reverts back to the standard mode if the firmware upgrade is successful. Consequently, if there is an error during the firmware upgrade, the module will not be usable anymore unless a successful firmware upgrade is performed.
visionCATS switches the module in USB Dfu mode. The window shows the progress and the procedure waits for the device to come back in App mode.
Note
The DFU upgrade requires a specific driver to be installed. See DFU Driver.